|
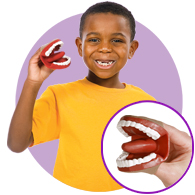
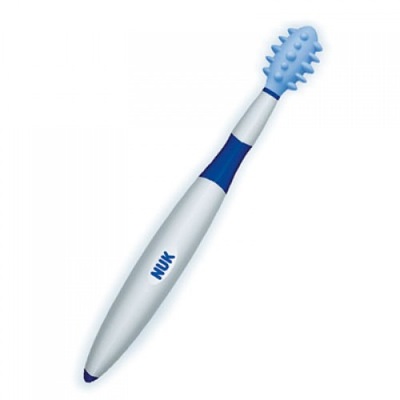
Oh, that R! That stubborn R sound! It’s the bane of a speech pathologist’s existence! Here are our tricks to get your child to produce an R sound. 1. It’s important to start by showing a child the anatomy of the mouth and where exactly the R sound happens. What’s the best way to do this? Well, with a giant mouth of course! We also like this little one so kids can have their own while we are showing them. 2. We often get asked what books or resources are out there . Our favorite therapy manual to teach the stubborn R sound. 3. If there are no allergies, we like to work with peanut butter. Have the child put some peanut butter on the top of their palate. Now have them use the tip of their tongue to try to clean and push the peanut butter to the back of their mouth. It will help them with tongue mobility and to find the proper tongue placement to produce and R sound. 4. Back to peanut butter! We use a nuk brush or a tongue depressor to apply some peanut butter to the inside surface of the top molars. We then ask the kids to try to taste the peanut butter only using the side surface of their tongue. This helps them learn to flatten the tongue and get good lateral placement.
5. Words we love to help us teach R! We use “Eureka” and “Carla” a ton for R placement. See this therapist use it in action here. We use the word “Eureka” to help teach the kids where to anchor their tongue on their top molars.
6. Practice biting on the sides of the tongue to help feel where the sides of the tongue need to go to make an R sound. After they have that down, ask them to slide the tongue out from the bite and say “gee gee gee” so that the tongue stays pushed on the side of the molars. Next step is to have them say “greee, greee, greee”. If the sound turns into “gwee”, I usually say, “oops! Your sides of your tongue slipped away! Let’s bite it back into place and try again!” 7. Sometimes kids need a visual cue of where the sound needs to be placed. Unfortunately, our mouths are not see-through so you can ask your therapist to use a Palatometer. It sits in the mouth and gives immediate computer screen feedback on R placement. Here’s a video that shows a Palatometer success story. It looks like a retainer and your speech pathologist will work with your dentist to have this made for you. This is more expensive than traditional speech therapy but it has huge success rates! 8. Try saying the sound “eeeeee” and now work toward the “r” sound by lifting the tongue tip and lowering the back of the tongue. 9. Work on some minimal pairs to help here the difference like “wipe/ripe, wake/rake, wind/rind” 10. say “shhhh”and don’t drop the middle of your tongue down when I ask you to say “shir”. Remember to try to glue the sides of your tongue to your top molars! Good luck! Remember the R sound may not be properly produced until the age of 7 but that doesn't mean you shouldn't start working on it early to get out of the habit!
0 Comments
|
A2 Therapy WorksMonthly tips, tricks, and activity ideas from our therapists! Archives
March 2022
Categories |


 RSS Feed